In This Video
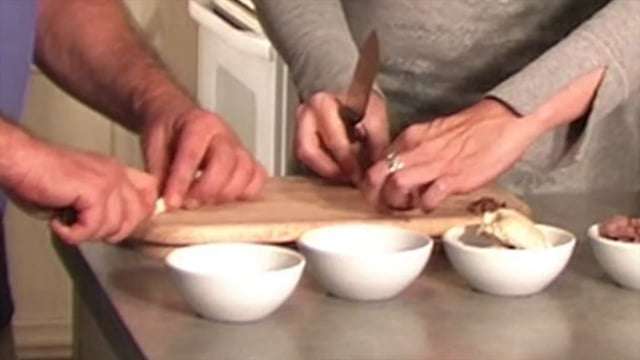
Jeannie and Dan demonstrate tuna fudge: a soft training treat made with four cans of water-packed tuna (including the water), four eggs and three cups of flour. They mix it, spread it onto a well-greased sheet pan and bake on the center rack at 350°F for 40 minutes. Chilling makes the final small cuts easier. See the updated storage guidance below; the transcript preserves the original recording.
Key Moments
0:39 — Four cans of water-packed tuna and four eggs
1:12 — Add three cups of flour, one cup at a time
1:43 — Why the cookie sheet needs to be well greased
3:06 — The soft texture that works best for training
3:46 — Bake at 350 degrees for 40 minutes
4:09 — Chill before the final cut to prevent crumbling
Full Transcript
0:00 — [Music]
0:13 — Jeannie: Hi, I’m Jeannie.
Dan: And I’m Dan.
Jeannie: We’re here today because we’re going to teach you how to make what we call tuna fudge. Actually, it’s tuna, eggs, flour, no preservatives. It makes a great, cost-effective treat that we use in dog training, or you can just use it for treats for your dog. Let’s get started, Dan.
Dan: Oh my gosh, and dogs just love it. They’re crazy about it.
0:39 — Jeannie: First of all, I have four cans of tuna, so mark that down: four cans of tuna. I have mushed it up. It has to be tuna in water. You use the whole can and the water because you’re not adding any other moisture other than four eggs. Four cans of tuna, four eggs. The next step is you want to go ahead and mix this really well, so I’ll let Dan.
Dan: Sure, I’ll hop in here.
Jeannie: Thanks. Go ahead and mix that up. Just crank it. You got it, Dan.
1:12 — Jeannie: Excellent. Then it’s three cups of flour. I add one cup at a time, so we’ll add our first cup. There you go. By the time you get to the third cup—here we have a batch all done already, so I’ll let you set that aside, Dan.
Dan: Sure.
Jeannie: Dan did this before we started, and he got to find out that it’s a little bit of a workout. Now we have it all mixed up. We want to take a cookie sheet, and I’ve well greased it.
1:46 — Jeannie: The reason I’m saying “well greased” is the first couple times I made it, Dan, I didn’t grease it as well. I just sprayed it and went. No, no, no, no. It will stick. There are no oils in here, which again is really good, so I greased it really well. Then I just start putting out big old dollops because you are going to have to smear this all around on your cookie sheet.
2:12 — Jeannie: What I’m going to show you is there are a couple different ways of making this. One gal in our rescue—I’m with Safe Hands Animal Rescue—says she takes this recipe, divides it in half, does it on two sheets, and uses a rolling pin. She sprays the rolling pin with a spray, then rolls it out. She cooks hers real crisp. We’re making a soft treat, great for training.
2:42 — Jeannie: Then I just start getting it all mushed around, I guess is a good technical term. Don’t you mush?
Dan: Yeah.
Jeannie: We’re just going to mush it all around. I would just keep putting all my dollops on here because it makes it easier when you go to spread it around. We’re just going to get it all on our pan.
3:06 — Jeannie: What I found is the best thing, and why I like this recipe rather than the real crisp, is we do a lot of training with this, and you want it soft but cooked. When you’re trying to pound out some reps when you’re dog training—
Dan: Oh yeah.
Jeannie: You need to have them chew, chew, swallow. After you get it all pushed out like this and just get it spread out, you do not have to be a perfectionist with this at all. You’re not serving it at your next cocktail party.
3:37 — Jeannie: Dan, if you want to grab—we have another pan that’s in the oven. The one in the oven that we’re pulling out, we cooked that center rack, 350 degrees for 40 minutes. Let’s set this one aside. We’ll let you see what it looks like.
Dan: Excellent.
Jeannie: Oh, that just looks—actually, it’s all human grade. There are no preservatives in this.
Dan: That’s excellent.
4:00 — Jeannie: The next thing I do is cool it. Put it on a cooling rack. I wait till it’s chilled—once it’s at room temperature, I should say. Then I just take a good old pizza cutter. Who knew? It took one of the people in a training class for Safe Hands Animal Rescue. I was using a knife, and I was talking about what work that was. She goes, “Use a pizza cutter,” and I went, “Oh, that was brilliant.”
Dan: Brilliant. Oh yeah, and look at this. It’s excellent.
4:30 — Jeannie: What I have found, though, when it comes to cutting it up into the finished product like this—this is what you want it to look like.
Dan: Exactly. Those are a finished product.
Jeannie: What I do, Dan, is I take it and cut it up into [unclear]. Then I go ahead and package it, put it in the fridge overnight, and there’s a reason for that. When I start cutting this really fresh stuff that came out of the oven and is now at room temperature, it tends to not cut as easily and crumble a bit.
5:01 — Jeannie: If you grab the stuff I have out of the fridge, I package it up, pull it out the next day, and that’s when I do all my cutting up. Here we are. I just take out one of these little rectangles and start cutting.
Dan: Oh, it’s much better.
Jeannie: Isn’t it? See, it’s not as flaky. It’s got some stiffness to it. It works really good. After I’ve done numerous strips like this, I’ll do the whole thing like that.
5:30 — Jeannie: I just take it, and that’s why, when I’m doing this part, when it’s fresh it wants to kind of crumble. But when it’s got some firmness from overnight in the fridge, or an evening in the fridge before you cut it, it cuts so much easier.
Dan: Those are great-size pieces too for training.
Jeannie: Then we just package them up. As you can see here, I have finished product. I end up with about eight of these, so it’s very cost effective.
Dan: That’s a lot of treats.
6:02 — Jeannie: Yes, it is, and it’s great. Give them to your next-door neighbors, give them as presents, or put them in your freezer. Just remember: no preservatives. I put one bag in my fridge. It lasts for about a week.
Dan: Okay.
Jeannie: The rest all go in the freezer, so when I finish one bag, I can just pull out another.
Dan: That’s awesome.
6:21 — Jeannie: Let’s just go over it again.
Dan: Sure.
Jeannie: Just so everybody knows, we are doing four cans of tuna in water. Use the water; do not drain. Four eggs.
Dan: Okay.
Jeannie: Three cups of flour.
Dan: That’s easy.
Jeannie: Yes. A well-greased pan, so as you can see, this didn’t stick at all.
Dan: Awesome.
Jeannie: Then we mush it all out. We bake it in the oven, center rack, 350 degrees, 40 minutes.
Dan: Okay, that’s easy.
6:52 — Jeannie: Cool it, cut it. I put it in the fridge because I think it’s much easier to cut once you have it, then cut it up, put it in all your little snacky baggies, and you are good to go.
Dan: Thanks for joining us today to learn about making tuna fudge.
Jeannie: I haven’t met a dog yet that doesn’t just love it, and it’s simple, easy.
Dan: You know what I love most is that it’s not full of a list of ingredients you can’t even pronounce that I’m giving my dog.
Jeannie: Nope. All human grade. Thanks for joining us. Bye.
Dan: Bye.
7:29 — [Music]
Tuna fudge: a name that promises dessert and delivers fish. Your dog may find this an excellent arrangement.
Updated written companion · October 2026. Here is the recipe from this earlier video, with practical reward and storage guidance.
Dog Treat Recipe: Tuna Fudge
If your dog enjoys these ingredients and can safely have them, this soft treat can be cut into small training portions. It is an optional reward, not a requirement for good training.
Small Portions for Practice
Small, easy-to-eat rewards let you practice without a long snack break after every repetition. What your dog enjoys matters more than whether you made it yourself.
Let Your Dog Help Choose
Try a small piece first. Notice whether your dog wants to work for it, and use food that fits their dietary needs. Ask your veterinarian if restrictions or health concerns affect treat choices.
The Recipe (Simple on Purpose)
- 4 cans water-packed tuna, including the water
- 4 eggs
- 3 cups flour
Mix, spread on a well-greased sheet pan and bake on the center rack at 350°F for 40 minutes, as demonstrated. Cool promptly and refrigerate; chill before cutting into small pieces.
Updated storage: treat this fish-and-egg recipe as a perishable cooked food. Refrigerate within two hours (one hour above 90°F), keep refrigerated at 40°F or below, and use within three to four days. Freeze spare portions promptly. This follows USDA guidance for cooked leftovers, rather than the longer refrigerator estimate in the original video.
When to Use (and When Not To)
Use a reward your dog values, mark the response clearly and keep the next step achievable. A tastier treat may help with distractions; it cannot substitute for creating space when a dog is frightened.
Learning continues during upset. Adjust the situation and offer support rather than demanding a performance.
How This Fits the Way We Teach
Fade a food lure as you build the cue, while continuing to reinforce useful responses. Food, sniffing and suitable play can all be rewards when the dog values them and you arrange access.
The Takeaway
A useful training treat is one your dog enjoys and can comfortably eat.
For the teaching side, see choosing training rewards.
Until next time, have fun and enjoy your dog.
— Jody & your Dog Life Coaches