In This Video
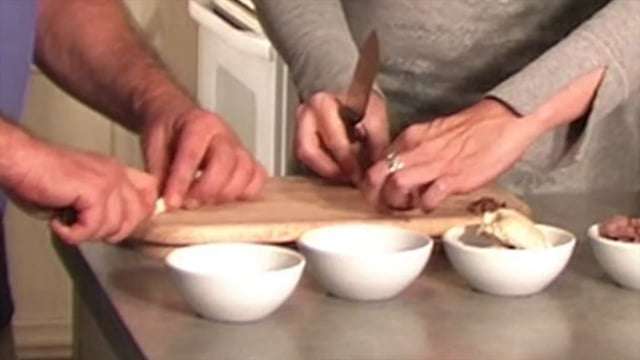
Jeannie and Dan make tuna fudge, a soft dog treat they use for training because dogs love it and can chew and swallow it quickly between repetitions. The recipe uses four cans of water-packed tuna, including the water, four eggs, and three cups of flour. You’ll see how to mix the dough, spread it onto a well-greased cookie sheet, and bake it on the center rack at 350 degrees for 40 minutes. Jeannie also shows why a pizza cutter makes portioning easier, why chilling the baked sheets before the final cuts prevents crumbling, and how to store the finished treats. With no preservatives, one bag stays in the refrigerator for about a week while the rest go in the freezer.
Key Moments
0:39 — Four cans of water-packed tuna and four eggs
1:12 — Add three cups of flour, one cup at a time
1:43 — Why the cookie sheet needs to be well greased
3:06 — The soft texture that works best for training
3:46 — Bake at 350 degrees for 40 minutes
4:09 — Chill before the final cut to prevent crumbling
Full Transcript
0:00 — [Music]
0:13 — Jeannie: Hi, I’m Jeannie.
Dan: And I’m Dan.
Jeannie: We’re here today because we’re going to teach you how to make what we call tuna fudge. Actually, it’s tuna, eggs, flour, no preservatives. It makes a great, cost-effective treat that we use in dog training, or you can just use it for treats for your dog. Let’s get started, Dan.
Dan: Oh my gosh, and dogs just love it. They’re crazy about it.
0:39 — Jeannie: First of all, I have four cans of tuna, so mark that down: four cans of tuna. I have mushed it up. It has to be tuna in water. You use the whole can and the water because you’re not adding any other moisture other than four eggs. Four cans of tuna, four eggs. The next step is you want to go ahead and mix this really well, so I’ll let Dan.
Dan: Sure, I’ll hop in here.
Jeannie: Thanks. Go ahead and mix that up. Just crank it. You got it, Dan.
1:12 — Jeannie: Excellent. Then it’s three cups of flour. I add one cup at a time, so we’ll add our first cup. There you go. By the time you get to the third cup—here we have a batch all done already, so I’ll let you set that aside, Dan.
Dan: Sure.
Jeannie: Dan did this before we started, and he got to find out that it’s a little bit of a workout. Now we have it all mixed up. We want to take a cookie sheet, and I’ve well greased it.
1:46 — Jeannie: The reason I’m saying “well greased” is the first couple times I made it, Dan, I didn’t grease it as well. I just sprayed it and went. No, no, no, no. It will stick. There are no oils in here, which again is really good, so I greased it really well. Then I just start putting out big old dollops because you are going to have to smear this all around on your cookie sheet.
2:12 — Jeannie: What I’m going to show you is there are a couple different ways of making this. One gal in our rescue—I’m with Safe Hands Animal Rescue—says she takes this recipe, divides it in half, does it on two sheets, and uses a rolling pin. She sprays the rolling pin with a spray, then rolls it out. She cooks hers real crisp. We’re making a soft treat, great for training.
2:42 — Jeannie: Then I just start getting it all mushed around, I guess is a good technical term. Don’t you mush?
Dan: Yeah.
Jeannie: We’re just going to mush it all around. I would just keep putting all my dollops on here because it makes it easier when you go to spread it around. We’re just going to get it all on our pan.
3:06 — Jeannie: What I found is the best thing, and why I like this recipe rather than the real crisp, is we do a lot of training with this, and you want it soft but cooked. When you’re trying to pound out some reps when you’re dog training—
Dan: Oh yeah.
Jeannie: You need to have them chew, chew, swallow. After you get it all pushed out like this and just get it spread out, you do not have to be a perfectionist with this at all. You’re not serving it at your next cocktail party.
3:37 — Jeannie: Dan, if you want to grab—we have another pan that’s in the oven. The one in the oven that we’re pulling out, we cooked that center rack, 350 degrees for 40 minutes. Let’s set this one aside. We’ll let you see what it looks like.
Dan: Excellent.
Jeannie: Oh, that just looks—actually, it’s all human grade. There are no preservatives in this.
Dan: That’s excellent.
4:00 — Jeannie: The next thing I do is cool it. Put it on a cooling rack. I wait till it’s chilled—once it’s at room temperature, I should say. Then I just take a good old pizza cutter. Who knew? It took one of the people in a training class for Safe Hands Animal Rescue. I was using a knife, and I was talking about what work that was. She goes, “Use a pizza cutter,” and I went, “Oh, that was brilliant.”
Dan: Brilliant. Oh yeah, and look at this. It’s excellent.
4:30 — Jeannie: What I have found, though, when it comes to cutting it up into the finished product like this—this is what you want it to look like.
Dan: Exactly. Those are a finished product.
Jeannie: What I do, Dan, is I take it and cut it up into [unclear]. Then I go ahead and package it, put it in the fridge overnight, and there’s a reason for that. When I start cutting this really fresh stuff that came out of the oven and is now at room temperature, it tends to not cut as easily and crumble a bit.
5:01 — Jeannie: If you grab the stuff I have out of the fridge, I package it up, pull it out the next day, and that’s when I do all my cutting up. Here we are. I just take out one of these little rectangles and start cutting.
Dan: Oh, it’s much better.
Jeannie: Isn’t it? See, it’s not as flaky. It’s got some stiffness to it. It works really good. After I’ve done numerous strips like this, I’ll do the whole thing like that.
5:30 — Jeannie: I just take it, and that’s why, when I’m doing this part, when it’s fresh it wants to kind of crumble. But when it’s got some firmness from overnight in the fridge, or an evening in the fridge before you cut it, it cuts so much easier.
Dan: Those are great-size pieces too for training.
Jeannie: Then we just package them up. As you can see here, I have finished product. I end up with about eight of these, so it’s very cost effective.
Dan: That’s a lot of treats.
6:02 — Jeannie: Yes, it is, and it’s great. Give them to your next-door neighbors, give them as presents, or put them in your freezer. Just remember: no preservatives. I put one bag in my fridge. It lasts for about a week.
Dan: Okay.
Jeannie: The rest all go in the freezer, so when I finish one bag, I can just pull out another.
Dan: That’s awesome.
6:21 — Jeannie: Let’s just go over it again.
Dan: Sure.
Jeannie: Just so everybody knows, we are doing four cans of tuna in water. Use the water; do not drain. Four eggs.
Dan: Okay.
Jeannie: Three cups of flour.
Dan: That’s easy.
Jeannie: Yes. A well-greased pan, so as you can see, this didn’t stick at all.
Dan: Awesome.
Jeannie: Then we mush it all out. We bake it in the oven, center rack, 350 degrees, 40 minutes.
Dan: Okay, that’s easy.
6:52 — Jeannie: Cool it, cut it. I put it in the fridge because I think it’s much easier to cut once you have it, then cut it up, put it in all your little snacky baggies, and you are good to go.
Dan: Thanks for joining us today to learn about making tuna fudge.
Jeannie: I haven’t met a dog yet that doesn’t just love it, and it’s simple, easy.
Dan: You know what I love most is that it’s not full of a list of ingredients you can’t even pronounce that I’m giving my dog.
Jeannie: Nope. All human grade. Thanks for joining us. Bye.
Dan: Bye.
7:29 — [Music]
Some training tools catch on because they’re trendy. Others last because they work. Tuna fudge falls squarely into the second category.
In this video, Jeannie and Dan share a simple homemade dog treat recipe we’ve used for years — why it’s so effective in training, how to make it, and when to use it for the biggest impact without overdoing it.
Dog Treat Recipe: Tuna Fudge
Every trainer has a short list of tools they come back to again and again — not because they’re flashy, but because they’re reliable.
Tuna fudge is one of ours.
It’s not gourmet.
It’s not expensive.
And it hasn’t changed much in over ten years.
That’s exactly why it works.
Why Homemade Training Treats Matter
Training treats aren’t just food.
They’re feedback.
A good training treat should:
be easy to eat quickly
hold value in distracting environments
keep the dog engaged without overstimulation
support repetition without frustration
Tuna fudge checks all of those boxes.
Its smell carries.
Its texture is soft.
And it can be cut into tiny pieces without losing value.
Why Tuna Fudge Works So Well
The effectiveness of tuna fudge has nothing to do with novelty and everything to do with function.
It’s:
high-value without being overwhelming
consistent in texture and taste
easy to portion for high-rate reinforcement
cost-effective for regular training use
This makes it ideal for:
early learning stages
new environments
puppies who need frequent feedback
dogs who struggle to stay engaged outside the home
The Recipe (Simple on Purpose)
This isn’t a culinary exercise. It’s a training solution.
- 4 cans of water-packed tuna, water included
- 4 eggs
- 3 cups of flour
Mix it all together and spread it on a well-greased sheet pan. Bake at 350°F for 40 minutes. Let it cool, then chill it before the final cut into small, soft pieces.
Keep one bag in the fridge — it lasts about a week — and freeze the rest.
The power here isn’t the precision, it’s the predictability. Dogs don’t need variety. They need clarity.
When to Use (and When Not To)
Use tuna fudge when:
introducing new skills
training in higher-distraction environments
working with puppies or fearful dogs
you need fast, clear reinforcement
Don’t rely on it when:
a dog is overstimulated beyond learning
environmental management needs adjusting
criteria are unclear
A high-value treat can support learning — but it can’t replace clarity or emotional readiness.
How This Fits the Way We Teach
One of the biggest fears people have is creating food dependence.
In reality, consistent success builds confidence — not dependency.
As skills stabilize:
reinforcement becomes intermittent
life rewards take over
engagement becomes self-reinforcing
Tuna fudge doesn’t create reliance.
It creates understanding.
The Takeaway
This recipe has lasted for a reason.
It’s simple.
It’s effective.
And it supports learning without hype.
When something works for ten years across thousands of dogs, it earns its place.
Puppies starting under 16 weeks begin in Puppy & Me, and dogs 16 weeks to a year start in Life Skills 101 — both at our Eden Prairie school. For dogs of any age, we also come to you with in-home training.
Prefer to learn at home, at your own pace? Our online puppy training course was built for exactly that.
Until next time, have fun and enjoy your dog.
— Jody & your Dog Life Coaches